Getting Started
To get started, import the Strivr SDK Unity Package into your project via UPM (Unity Package Manager).
-
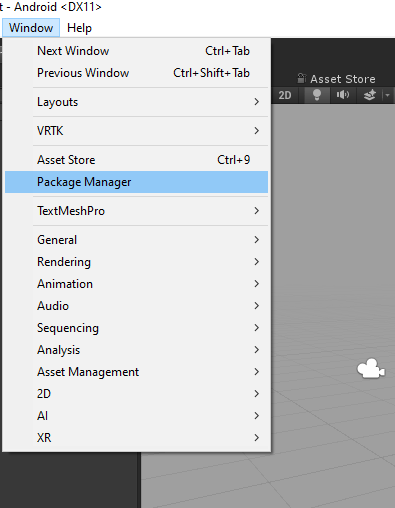
In Unity, go to Window → Package Manager
-
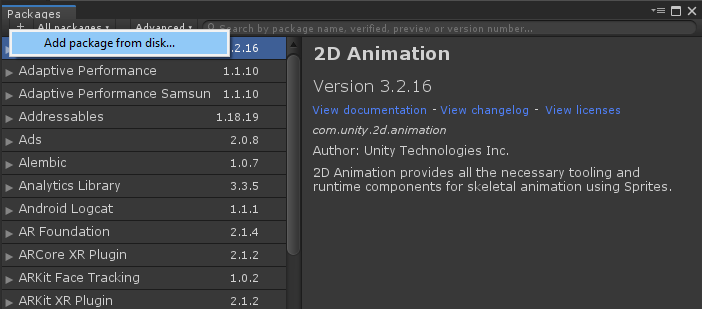
In the window that pops up, click the plus (+) icon in the status bar.
-
Click Add package from disk… to bring up a file browser
-
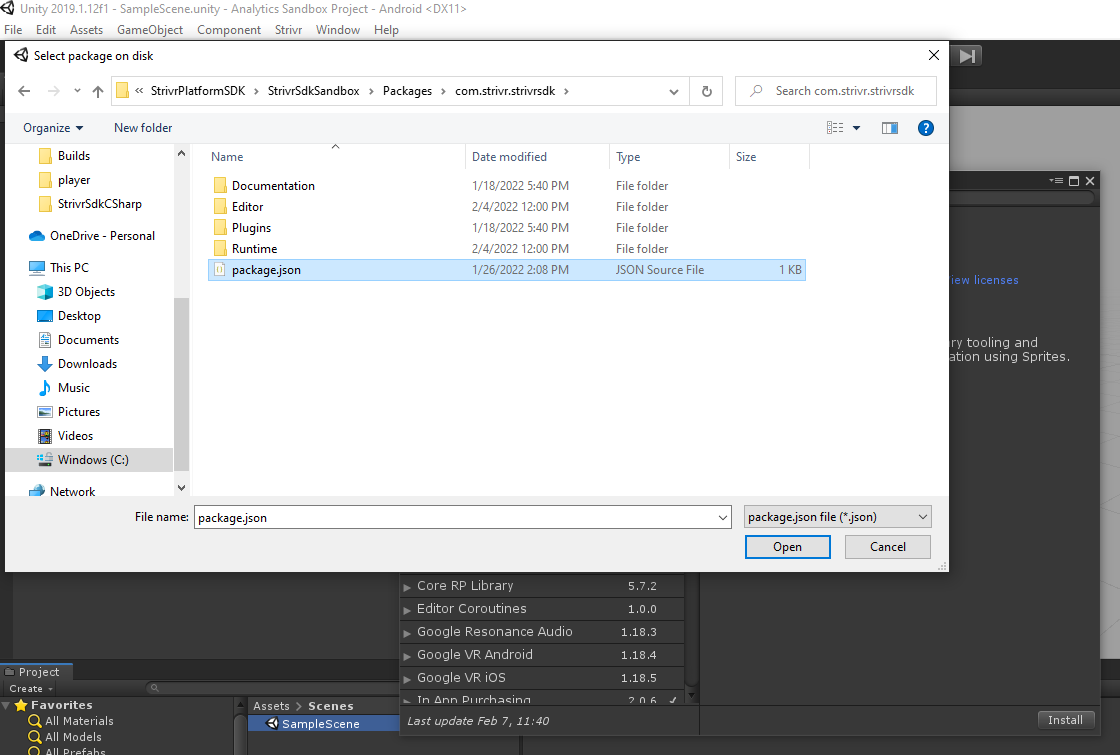
Navigate to the root of the com.strivr.strivrsdk folder that you downloaded.
-
Open the package.json file in the root folder.
Project Setup
Once the package is installed, you must first link your project before you can start tracking data.
-
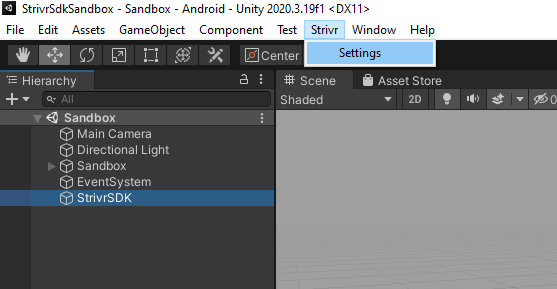
In Unity, go to Strivr → Settings
-
In the window that pops up, you will see three fields that you need to fill out: Developer Tenant Id, Project Id, and API Key.
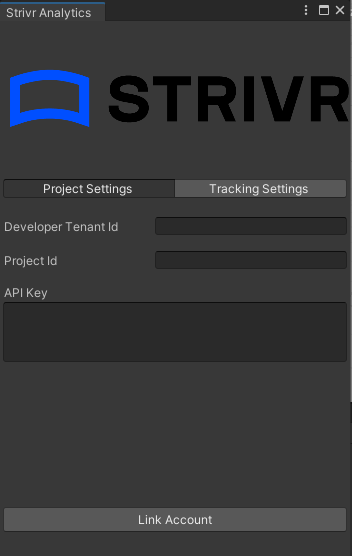
For each of the three fields, copy and paste the values that you received from Strivr. If you have any questions regarding this step, contact justin.cellona@strivr.com.
-
Once you fill out the three fields, click Link Account.
-
After your project is linked, you need to add Android dependencies to your project. You do this in two steps: adding the repository where the Android library is hosted and then adding the dependency itself.
Where to add the repository and dependency depends on if you are using Unity 2019 or a newer version. In both cases, you will need a file called mainTemplate.gradle.
-
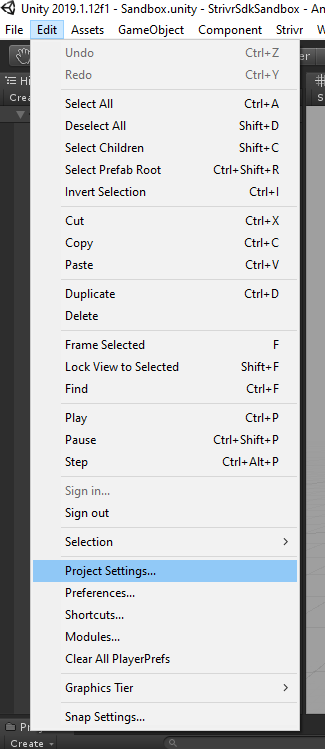
If you do not already have a file called mainTemplate.gradle in your project, you can create one by going to Edit → Project Settings…
Then, under Player → Android tab → Publishing Settings → Build, select the option that says "Custom Gradle Template" or "Custom Main Gradle Template". If it doesn’t already exist, this will automatically generate the mainTemplate.gradle file in the Assets/Plugins/Android directory.
If you are using Unity 2020 or newer:
Also select the following two options: "Custom Base Gradle Template" and "Custom Base Properties Template". If they don’t already exist, selecting these options will automatically generate baseProjectTemplate.gradle and gradleTemplate.properties, respectively, in the Assets/Plugins/Android directory.
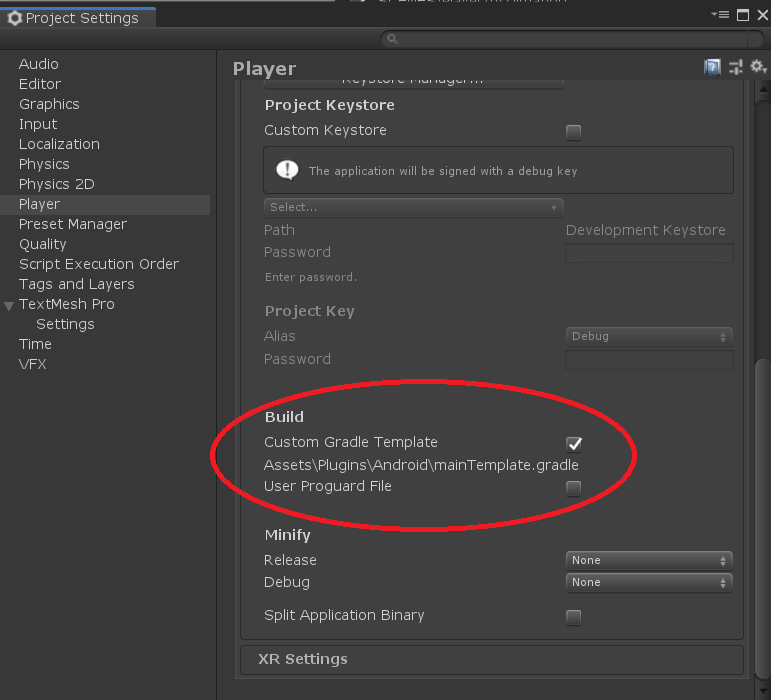 Project Settings in Unity 2019
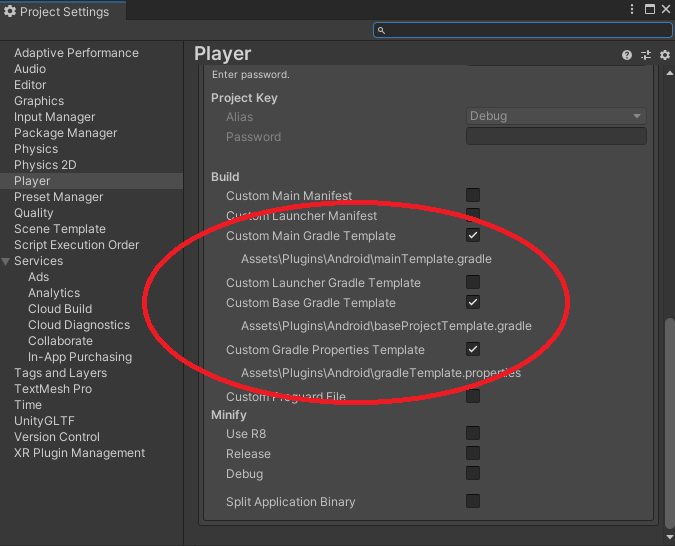 Project Settings in Unity 2020 or newer
Once these file(s) are created, open up mainTemplate.gradle.
If you are using Unity 2019:
Copy and paste the following line under the repositories section under allprojects.
maven {
    url 'https://pkgs.dev.azure.com/strivr/SDK/_packaging/StrivrPublicFeed/maven/v1'
}
Then copy and paste the following line under the dependencies section. Save the file.
implementation 'com.strivr.strivr.sdk:strivr.sdk:1.0.22158.03'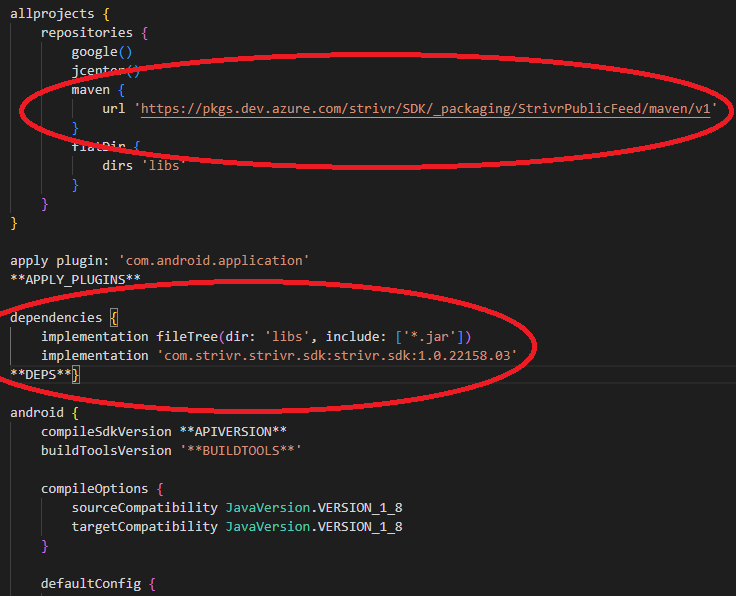 mainTemplate.gradle in Unity 2019
If you are using Unity 2020 or newer:
The maven repository goes in baseProjectTemplate.gradle while the dependency goes in mainTemplate.gradle.
In baseProjectTemplate.gradle, copy and paste the maven repository under both the allprojects/buildscript/repositories and allprojects/repositories sections
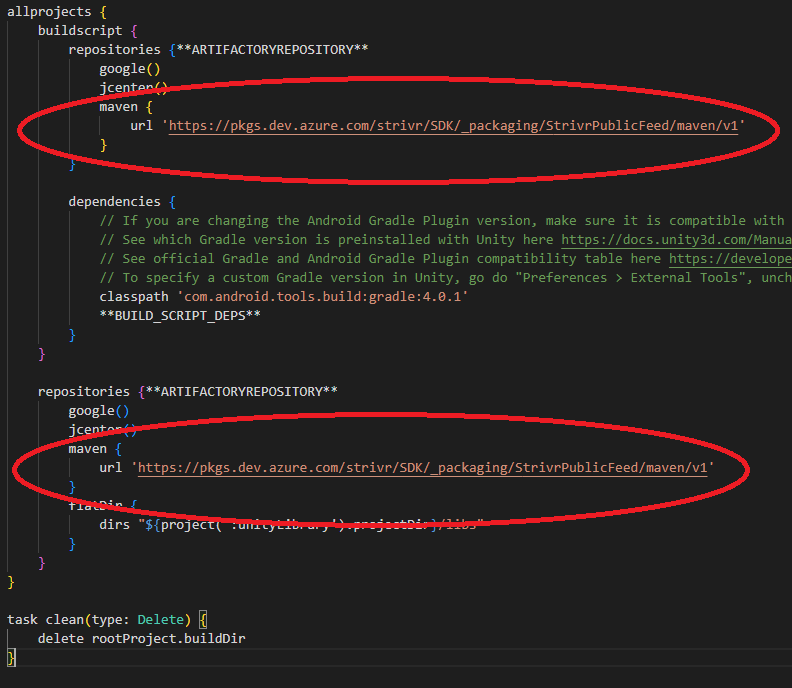 baseProjectTemplate.gradle in Unity 2020 or newer
In mainTemplate.gradle, copy and paste the dependency under dependencies
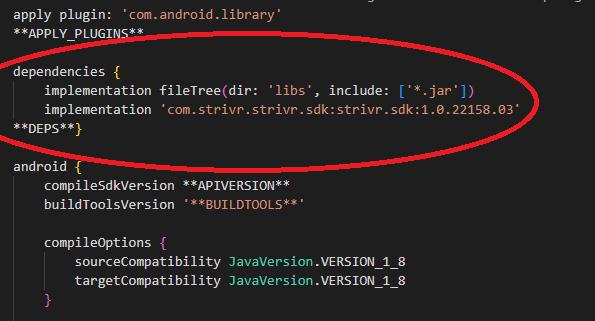 mainTemplate.gradle in Unity 2020 or newer
If present, remove the following comment at the top of mainTemplate.gradle and/or baseProjectTemplate.gradle:
// GENERATED BY UNITY. REMOVE THIS COMMENT TO PREVENT OVERWRITING WHEN EXPORTING AGAINIf you are using Unity 2020 or newer:
Open gradleTemplate.properties and copy and paste the following line under the **ADDITIONAL_PROPERTIES** section. Then, save the file.
android.useAndroidX=true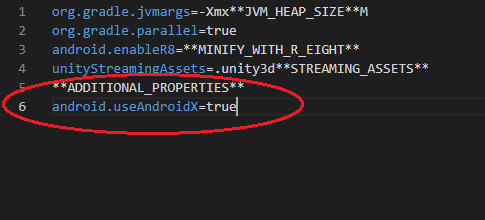 gradleTemplate.properties